 Publish Folders and Create Static Publish URLs
Publish a Folder
To publish a folder on DriveHQ, you must be a Paid Member or True member.
The system automatically creates "PublicFolder" for Paid members and True members. There are two ways of publishing a folder on DriveHQ.
- Method 1:
From the "My Storage" page or "Show Folder" page, select a folder (or file) and click on the "Publish" button, see below:
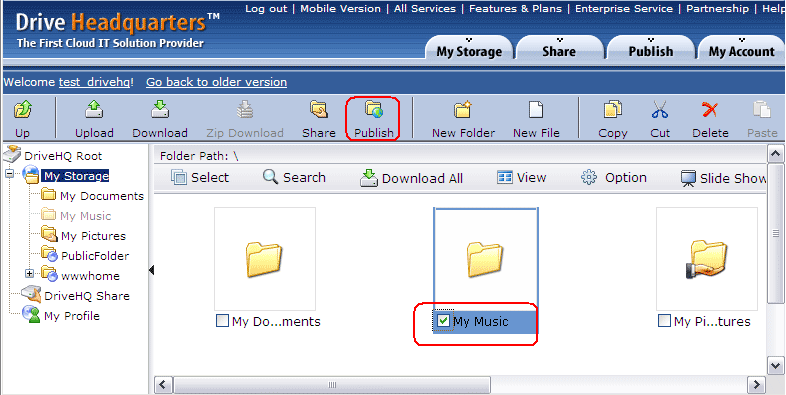
After you click on "Publish", it will go to the "publish & set permission" page.
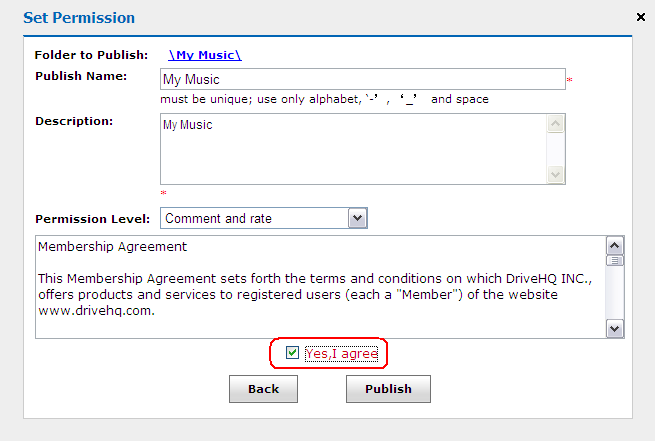
It is usually recommended to only use alpha-numeric characters for the Publish Name (and file names / folder names). When you publish a folder / file, usually you want to create Publish URLs for linking to the folder and files in it. If you have special characters in your file name / folder name or share name, then the publish URL might also contain such characters, which might corrupt the URL.
In the "Publish & Set Permission" page, you can enter the publish name, description, choose one from 4 permission levels, then check the "Yes, I agree" check box, and finally click on "Publish". It will publish the folder immediately, then redirect to the confirmation page as shown below:
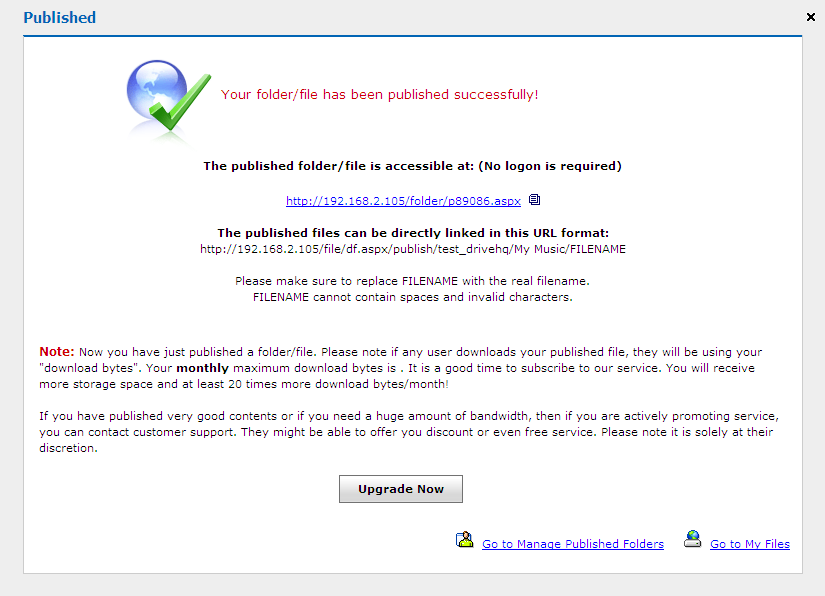
In the Publish Confirmation page, you can find the Publish URL for the folder and the Publish URL(s) for the files in the published folder.
- Method 2:
From the "DriveHQ Start Menu", click "Publishes". It will display the "Publish main page", Click "Publish a Folder", and then it will go to "Select One Folder" page.
Select a folder and click on the "Select" button, or click on the "New Folder" button to create a new Publish folder, see below:
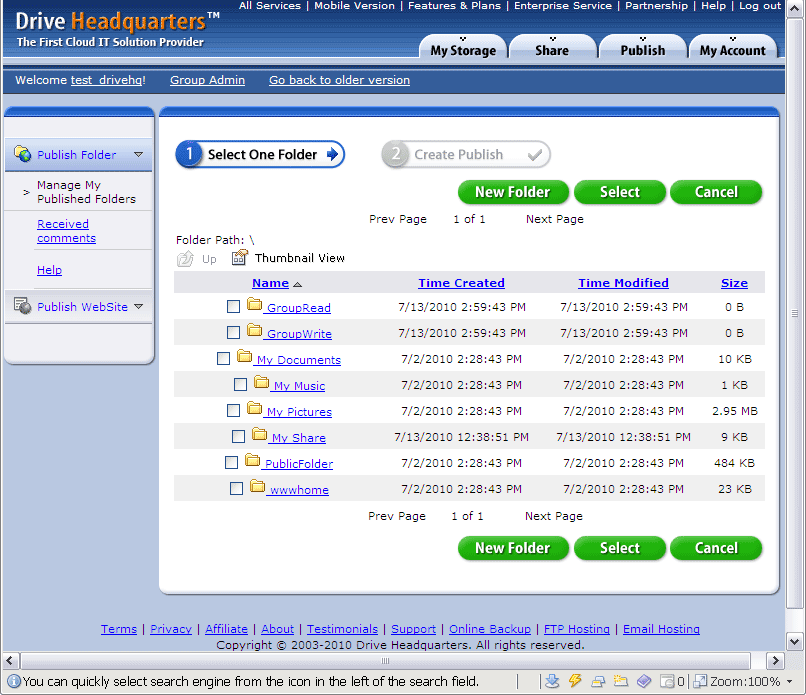
After selecting a folder, it will go to the "Set permission" page, shown as below:
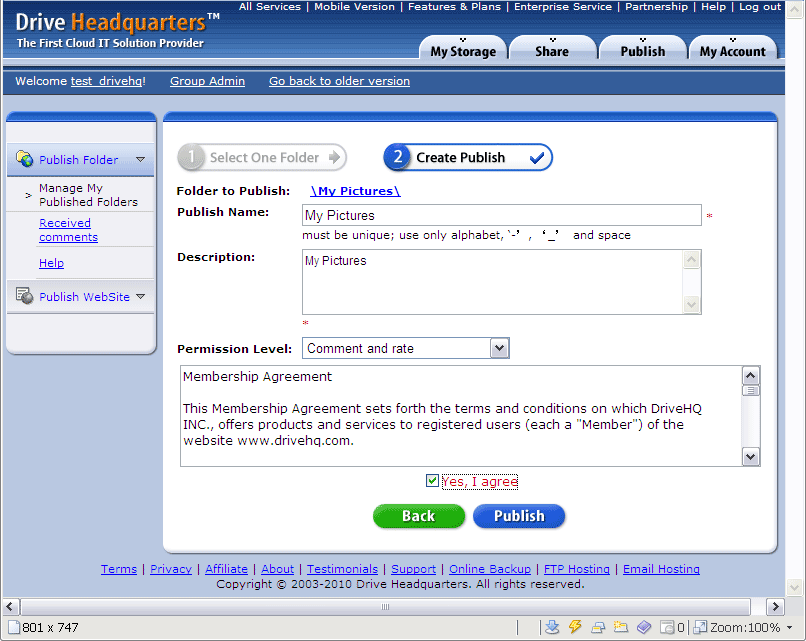
Note: Publish URLs for files in a published folder may not work if the Publish permission is set to "Large view only" or "Original view only".
The permission of "Large view only" and "Original view only" prevent the original file(s) from being downloaded.
Publish a File: You can also select only one file and publish it. The steps are pretty much the same. When you publish a file, the file is automatically copied to a new folder named My Share under the My storage folder path. The new folder is then published. This is done automatically by the system.
2.gif) If any user downloads your published files, they will be using your "download bytes".
You can subscribe to our service to receive more storage space and more download bytes!
If any user downloads your published files, they will be using your "download bytes".
You can subscribe to our service to receive more storage space and more download bytes!
 |
Top |
Manage existing "Publishes"
After you have published a folder, you might want to modify or delete it later. To do so, log on to www.drivehq.com, from the "DriveHQ Start Menu,
click "Publishes". You will see the main Publish Screen, then click "Manage My Publishes".
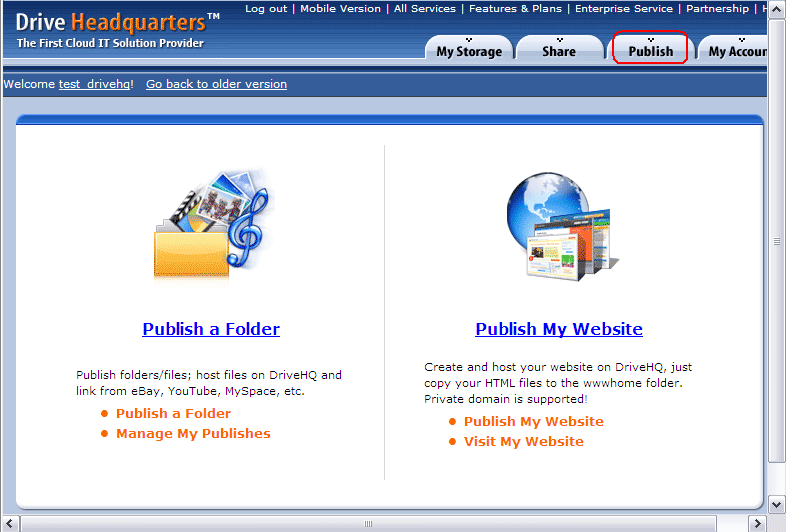
On the left hand side, you can easily publish a new folder by clicking on "Publish a Folder" link. To manage existing Publishes, click on the link "Manage My Publishes", it will go to the “List of Published Folders” page:
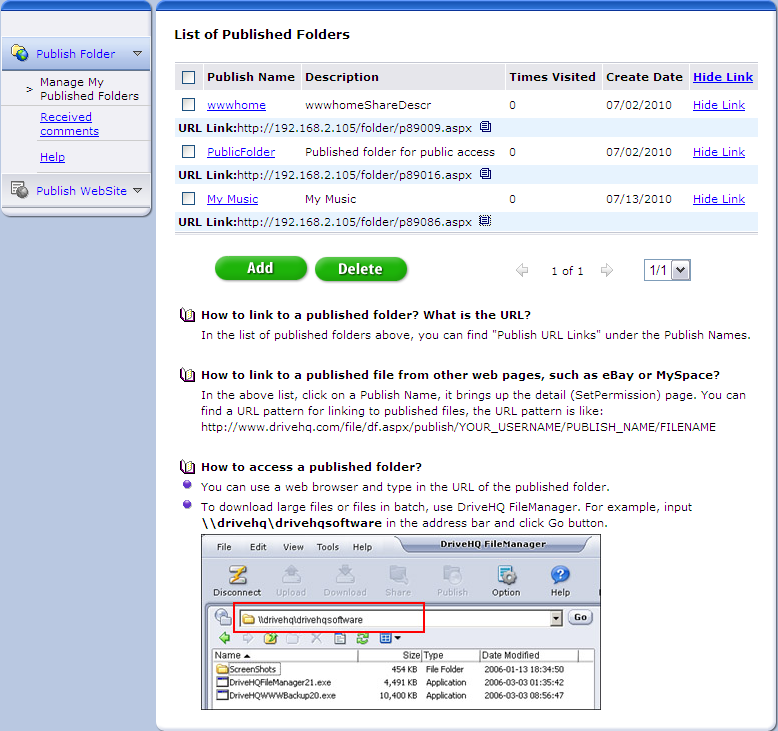
You can select a Publish to delete; or you can click on a Publish to modify it.
 |
Top |
Bandwidth Limit on Sharing and Publishing Files
To avoid abuse, there is a limit on your bandwidth usage. Usually you don't need to pay for the bandwidth; but if your account has
a lot of download activities (including other people accessing your shared/published files), you could run out of bandwidth and
your files will no longer be accessible. Bandwidth limit is based on monthly usage and is automatically reset after one month.
 |
Top |