Introduction
1. Method 1:
Add FirstCloudIT.com email account to Outlook with automatically detecting email server settings
2. Method 2:
Add email account to Outlook manually - Advanced Setup
3. Change email account settings
Introduction
DriveHQ is a leading Enterprise Cloud IT service provider. It is a one-stop shop for most IT services, such as
Cloud File Server, Cloud FTP Server, Static Web Hosting and Business Email Hosting & Backup service.
DriveHQ Business Email Hosting Service is included in our Cloud IT Service plans for no additional charge.
It supports SMTP, POP, IMAP, Webmail and Custom Domains. It is compatible with almost all email client software and mobile devices.
DriveHQ Business Email Hosting Service is not a free email service; it is a low-cost alternative to Microsoft Exchange Server and other expensive
email hosting services.
In this document, we will talk about how to setup a FirstCloudIT.com email account on Microsoft Outlook 2016.
The information is also useful in configuring other email client applications.
To use Outlook with DriveHQ's email service, you must have a DriveHQ account first. A DriveHQ user is automatically
assigned with a FirstCloudIT.com email account (USERNAME@firstcloudit.com). If you have your own company domain name,
you can also use custom domain email addresses.
If you don’t have a DriveHQ account, you can:
- Visit www.DriveHQ.com website to sign up for a free account. The free account does not expire,
but it has many limitations. You can use it to try our service only.
- If you are an administrator, you might want to create sub-accounts for your users/employees.
A sub-user of a paid Group Account is considered a paid account.
1. Method 1: Add FirstCloudIT.com email account to Microsoft Outlook with automatically detecting email server settings
Launch Microsoft Outlook 2016. If it has no email accounts configured, it will display the following screen:
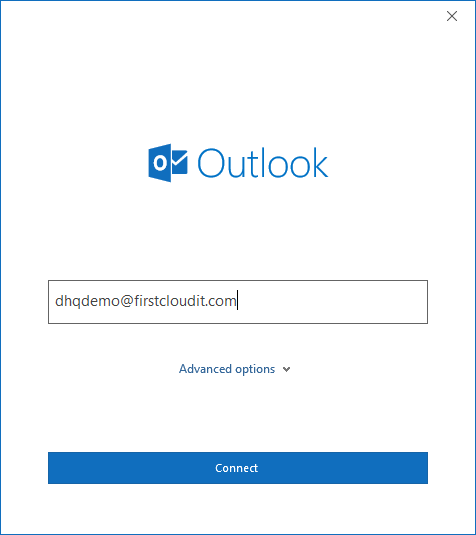
Enter your email address, e.g. USERNAME@firstcloudit.com. (If you want to use a custom domain email address, you must own a domain name, configured your
DNS MX record, and configured the domain name with our email system.) Click "Connect", Outlook will try to automatically
detect the email server settings for you. (It does not work with all email domains, but seems to work very well for
FirstCloudIT.com email addresses.) If it can successfully detect the email server settings, it will display the following screen for the password info:
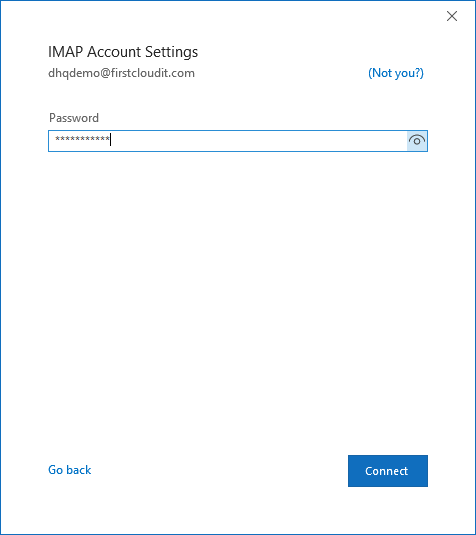
By default, Outlook will add the email account as an IMAP account. IMAP stores your emails and mailboxes in the server.
It is recommended if you need to access your emails from multiple devices. Enter your DriveHQ account password, then
click Connect.

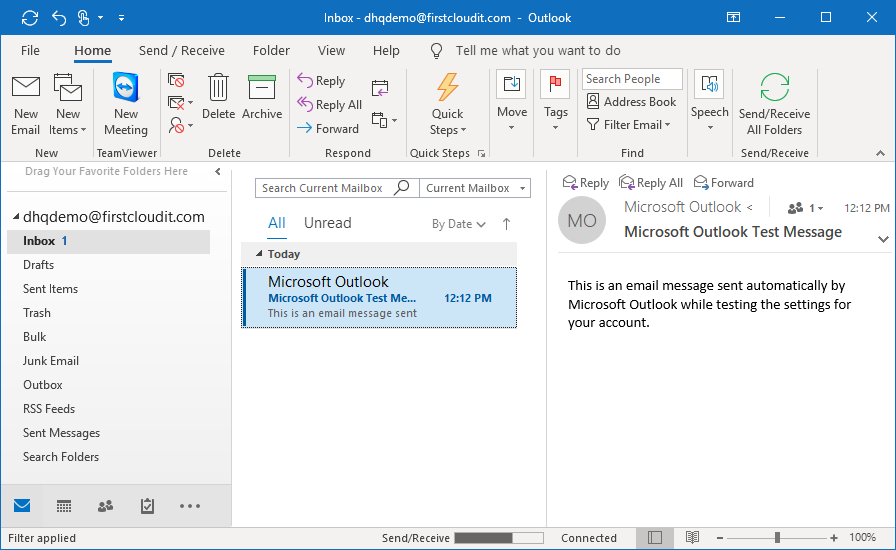
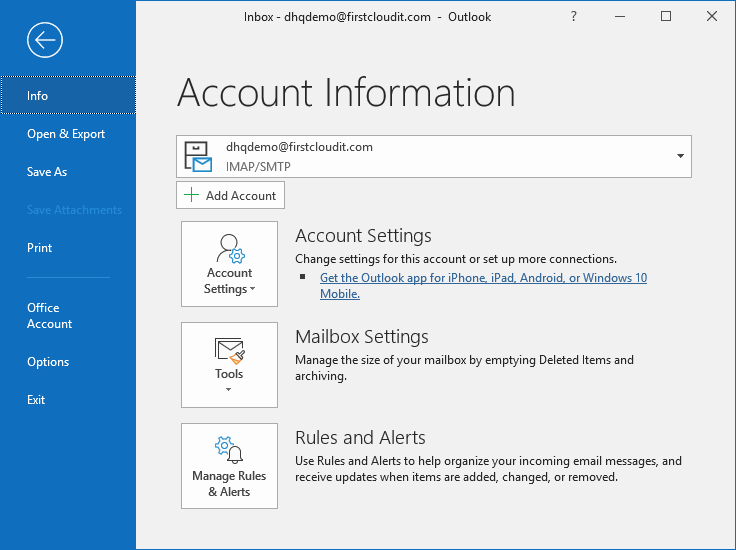
Your FirstCloudIT.com email account is added successfully! Click Done to finish it. It will display the Outlook main window as shown below:
2. Method 2: Advanced Setup - add FirstCloudIT.com email account to Outlook manually
If Outlook failed to detect your email server settings, you can configure email server settings manually. Usually, Outlook will automatically let you
enter the email server settings. Let's start from the beginning. Launch Outlook, it will display the same initial screen as documented in Method 1, or
if you can see the Outlook main window, then click the File menu, then click "Add Account".
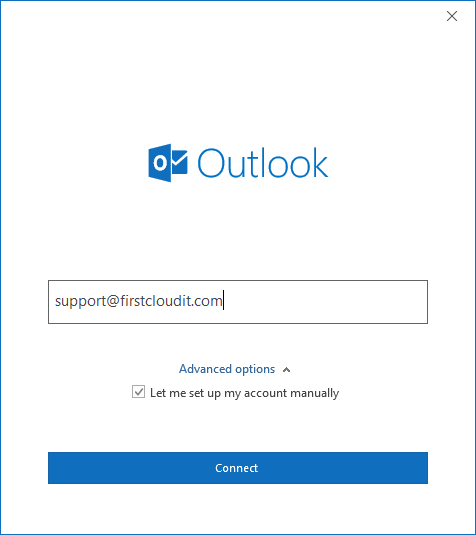
It will popup a dialog window for you to enter your email address. (e.g. USERNAME@firstcloudit.com).
Click "Advanced Options", then check the checkbox of "Let me setup my account manually". See the screenshot below:
Click Connect, it will display the following screen:
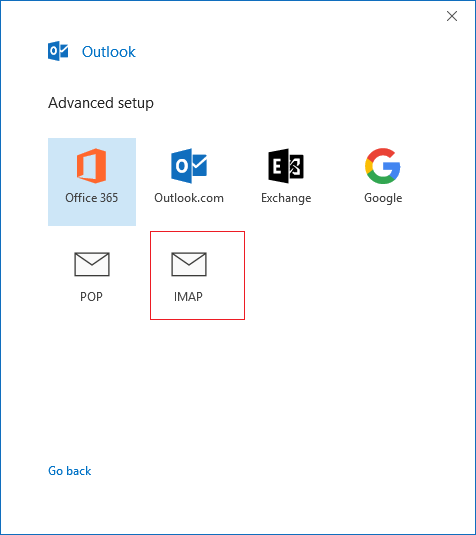
Click IMAP or POP. (IMAP is recommended if you need to access your emails from multiple devices.
Note once an email account is added to Outlook, you cannot edit the account type directly. You will have to delete
the account and add it again.)
Outlook may still try to detect your email server settings. If it fails, it will display the following dialog:
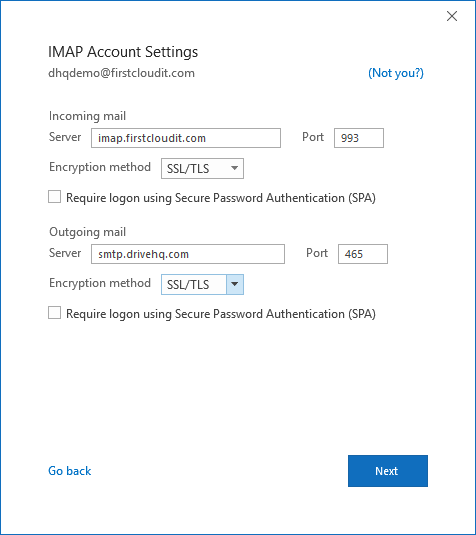
Please enter the server settings as shown in the above screenshot:
- Incoming server: imap.firstcloudit.com; Port: 993; Encryption method: SSL/TLS
- Outgoing server: smtp.firstcloudit.com; Port: 465; Encryption method: SSL/TLS
- Outgoing server: pop.firstcloudit.com; Port: 995; Encryption method: SSL/TLS
If somehow your email client or your network cannot support SSL/TLS, you can use the plain IMAP/SMTP/POP protocol.
The Plain SMTP port number is 25, the plain IMAP port is 143, and the plain POP port number is 110.
If you have setup your custom domain email on DriveHQ.com website, you still need to use the above server names.
If you use your own domain server names, it will display an SSL certificate error.
Click Next and follow the wizard to finish setup.
3 Change Your Email Account Settings
By default, your email account is setup as an IMAP account with SSL/TLS encryption. Usually you don't need to change it.
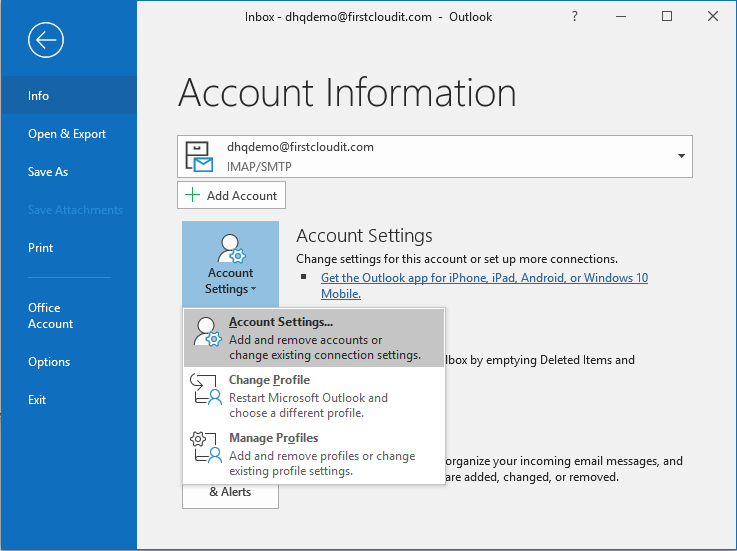
If you need to change the settings, first, click the File menu in the Outlook main window, it will display the following screen:
Click the Account Settings button, then select Account Settings, it will display a list of email accounts configured with your Outlook.
Double click on the email account, (select it and click Change), it will let you edit the IMAP settings of this email account.
To change more account settings, you need to click the Account Settings button, then click Manage Profiles. It will display the
following Mail Setup dialog:
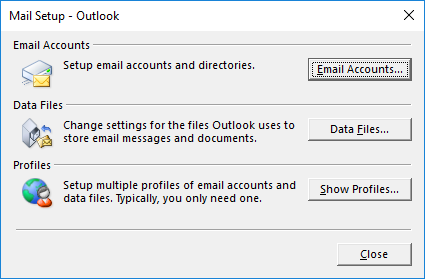
Click Email Accounts, it will display a list of email accounts. The dialog looks identical to the previous email account list screen, however,
when you double click on your email account, it display a very different "POP and IMAP account settings" dialog:
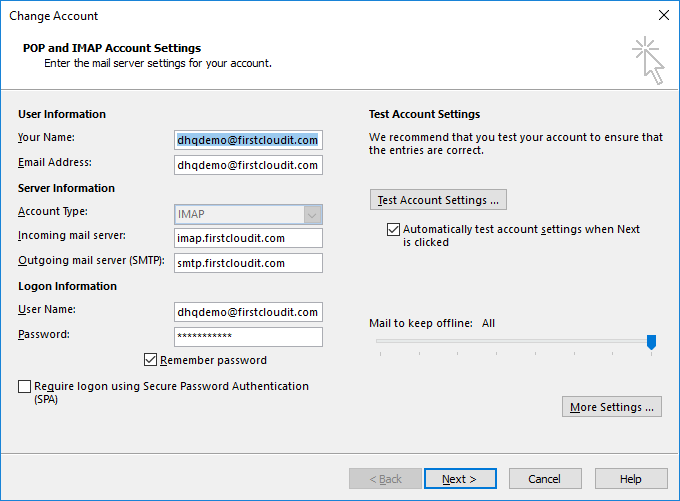
You can enter the information as described below:
| Your Name |
Your firstname and lastname
|
| Email Address:
|
Your firstcloudit.com or your custom domain email address
|
| Account Type:
|
IMAP (recommended) or POP
|
| Incoming mail server:
|
imap.firstcloudit.com (or pop.firstcloudit.com)
|
| Outgoing mail server:
|
smtp.firstcloudit.com
|
| Username & Password:
|
Your DriveHQ account username and password.
If you use an alias as your email address, or if you have
setup a custom domain email account on DriveHQ.com website,
please still use your DriveHQ account username as the username.
|
The default (automatic) configuration is usually fine. If you need to change it further,
you can click "More Settings", it will display the following dialog:

In general, we recommend the following parameters for better security:
- Incoming server: imap.firstcloudit.com; Port: 993; Encryption method: SSL/TLS
- Outgoing server: smtp.firstcloudit.com; Port: 465; Encryption method: SSL/TLS
- Outgoing server: pop.firstcloudit.com; Port: 995; Encryption method: SSL/TLS
If somehow your email client or your network cannot support SSL/TLS, you can use the plain IMAP/SMTP/POP protocol.
The Plain SMTP port number is 25, the plain IMAP port is 143, and the plain POP port number is 110.
If you have setup your custom domain email on DriveHQ.com website, you still need to use the above server names.
If you use your own domain server names, it will display an SSL certificate error.