Restore Files / Folders
After you have created a backup task and successfully run the backup task once,
you can restore your files / folders. DriveHQ offers many ways / options for you to restore files:
 You can restore your files / folders to the original location, or you can specify a different location to restore.
  You can restore files / folders to the same computer or any other computer.
  You can restore the whole backup task, or you can restore a single file / folder or multiple files / folders.
 You can restore an older version file.
 You can restore the whole backup task to a time before certain time.
In addition, you can restore files using DriveHQ.com website, DriveHQ FileManager client software or any FTP client software.
To restore files, you can simply logon DriveHQ Online Backup client software, click on the Restore tab; you will see the following screen:
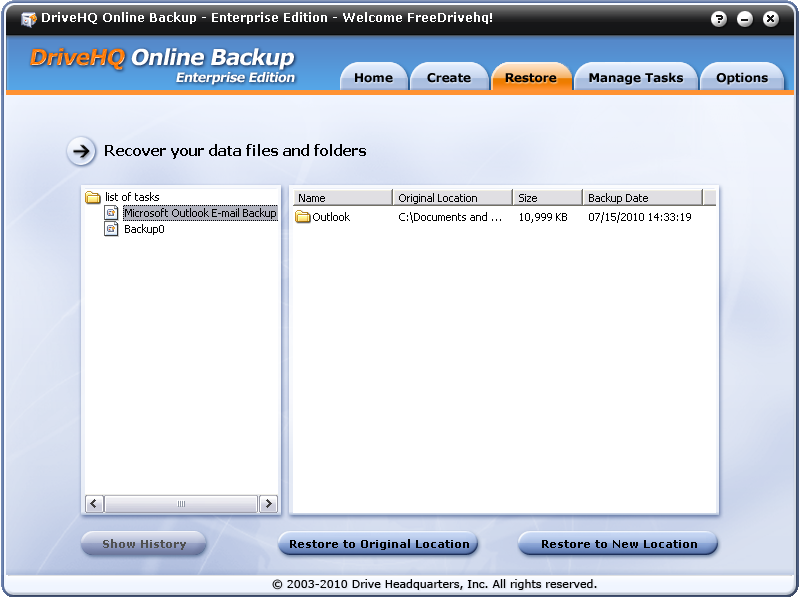
From the Restore screen, you can see the task list in the left-hand side. On the right-hand side, you can see the list of files and folders backed up by the selected backup task.
Restore all files / folders
If you want to restore all files / folders backed up by a backup task, then select the backup task in the left-hand side, right click on the task name, it will pop up a menu as shown on the screenshot below:
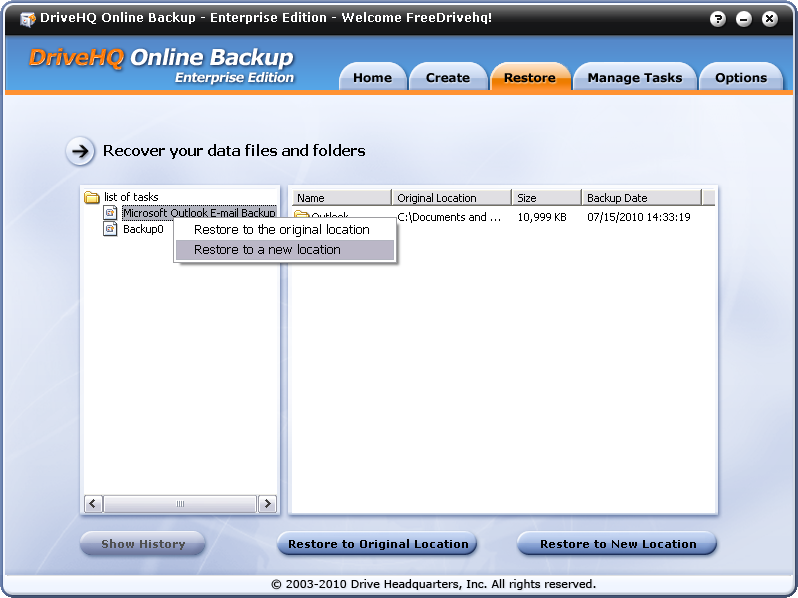
Click on the popup menu item "Restore to the original location" or "Restore to a new location", you can restore the whole task. If you select "Restore to the original location", it will pop up a new dialog as below:
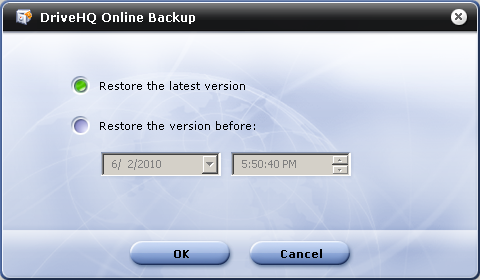
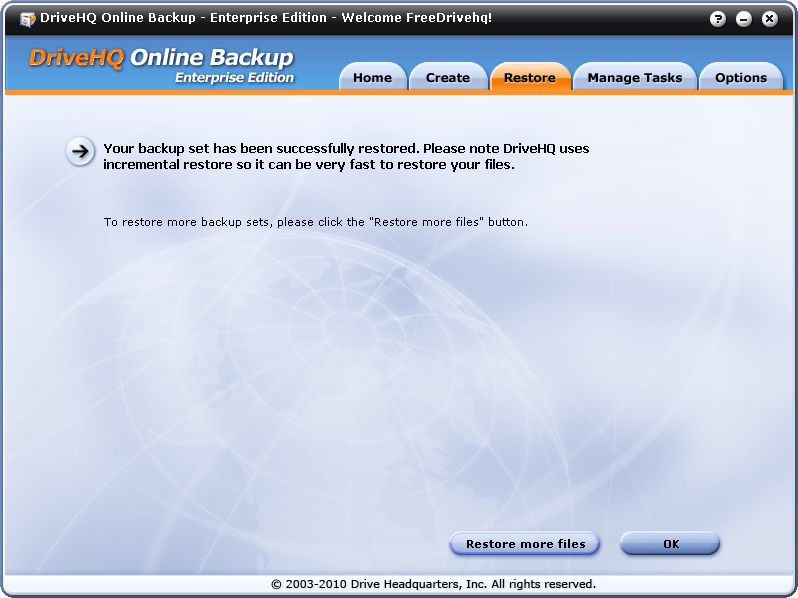
From the above screen, you can restore the latest version files, or you can restore an older version of all files before certain time. The file time uses your local time. Click on OK, it will start restoring the files. Dependent on your task size, it could take a very long time to restore. Once it finishes, it displays the following screen:
If you select "Restore to a new location", it will ask you to browse a new local folder; the rest is the same as restore to the original location.
Restore the selected files / folders
From the Restore tab, on the right-hand side, you can see files / folders backed up to DriveHQ. You can double click on a folder name to navigate to the sub-folders and files in it. To go back to the parent level folder, just double click on 
Once you locate the file(s) / folder(s) you want to restore, you can select the file(s) / folder(s). You can hold down the Ctrl key or Shift key to select multiple files and folders.
After you have selected the files / folders to restore, you can either right click on the folder(s) / file(s), or click on the button "Restore to Original Location" or "Restore to New Location".
Restore older version files
You can use DriveHQ Online Backup to restore old version files. To do so, from the Restore tab, click on the task name, then navigate the folders and locate the file that you want to restore. Click on the filename to select the file. Note if you want to restore an older version, then you can only select one file. After you select one file, the "Show History" button at the bottom left corner will become enabled as shown below.
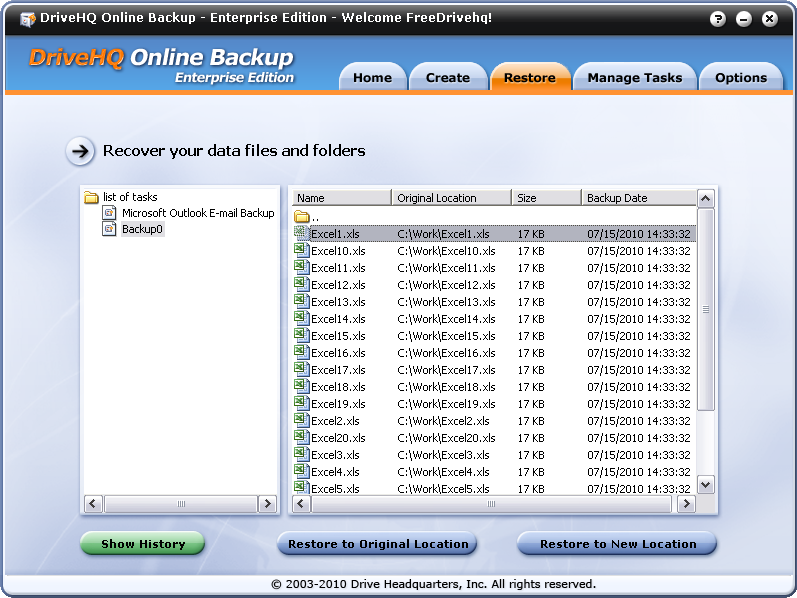
You can click on the Show History button or right click on the file and click on the "History" menu. It will open a "File version history dialog" as shown below.
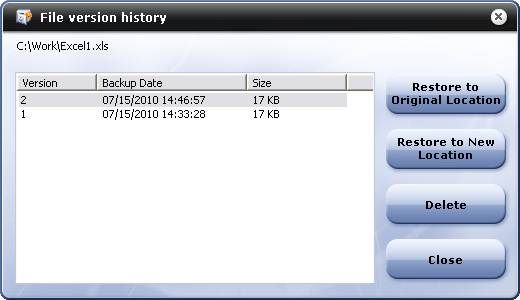
You can then select a version to restore or to delete.
Note: if you want to restore an older version of all files in the backup task, then you must select the whole backup task to restore. Please read the previous section for more details.
NOTE: DriveHQ provides 1GB storage space and 406MB download bytes as soon as you sign up as a DriveHQ member. The application will scan the size of backup data automatically. If the restore data exceeds your download bytes, it will pop up a message box to prompt you to order more space, shown as bellow:
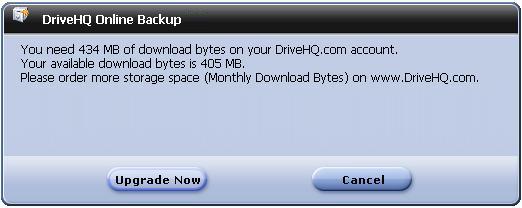
Click Upgrade Now to go to Subscribe Webpage to upgrade to a Paid Account.
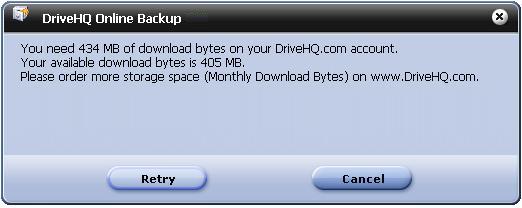
If the Subscribe Webpage don't be shown, click Retry button.